What it is
Every custom status belongs to one of six states: Pending, Active, Completed, No show, Cancelled, and Invalid. The state decides what happens to the time slot, connected calendars, and notifications. The name is up to you.
Slots stay safe
Pending and Active statuses hold the time slot. Completed, No show, Cancelled, and Invalid free it. Moving between statuses in the same state only changes the label, with no extra notifications.
Nothing to migrate
Unconfirmed, Confirmed, Showed, No Show, Cancelled, and Invalid become your defaults. Existing appointments and workflows keep working.
Automate the exact stage
Workflow triggers, actions, and filters list your custom statuses, so you can send a message the moment an appointment moves to Checked in.
Per-attendee for classes
On class booking calendars, you can set a status for each attendee.
Who it's for
Businesses where an appointment has more steps than booked and showed.
- Med spas & clinics
- HVAC, plumbing & roofing crews
- Pool service
- Real estate showings
- Fitness & class studios
Set it up in TraxionLab
Turn it on, add your statuses, then use them on appointments and in workflows. This is an early-access feature, so a few screens may look different in your account.
Part 1 · Turn it on
Log in at app.traxionlab.com, go to Settings → Labs, and turn on Custom Appointment Statuses.
Check in your account: If you do not see it in Labs, email support@traxionlab.com.
Part 2 · Add your statuses
Go to Calendars → Calendar settings, open the Preferences tab, and click Appointment status.
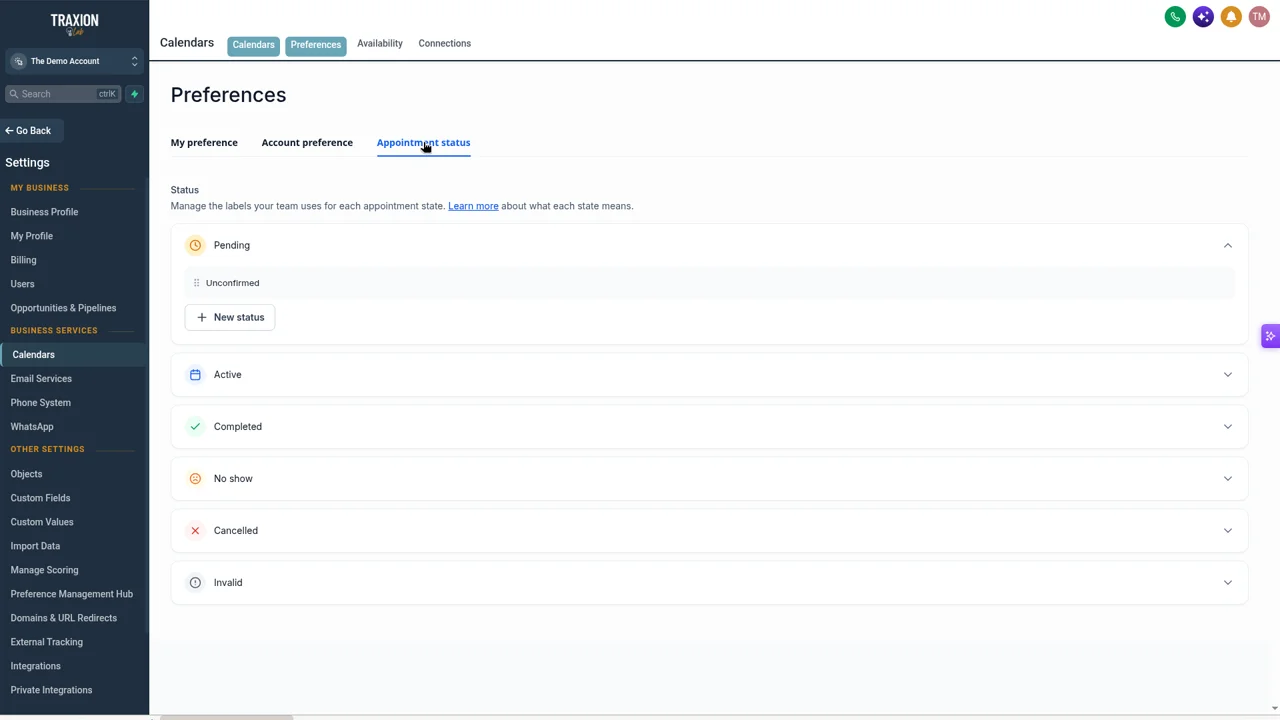
Under Status, you will see the six groups: Pending, Active, Completed, No show, Cancelled, and Invalid. Open a group to see its statuses.
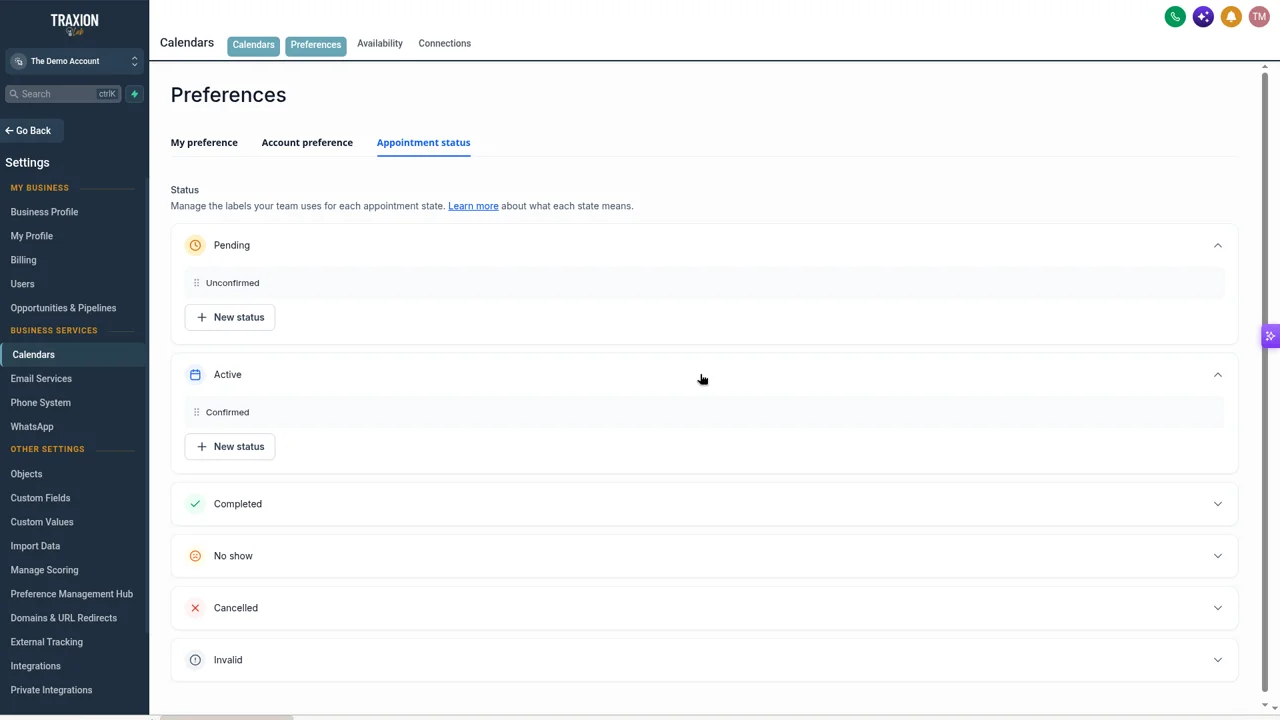
Click New status in a group, type the Status name, and click the check mark to save (or the X to cancel). Drag a row to change the order.
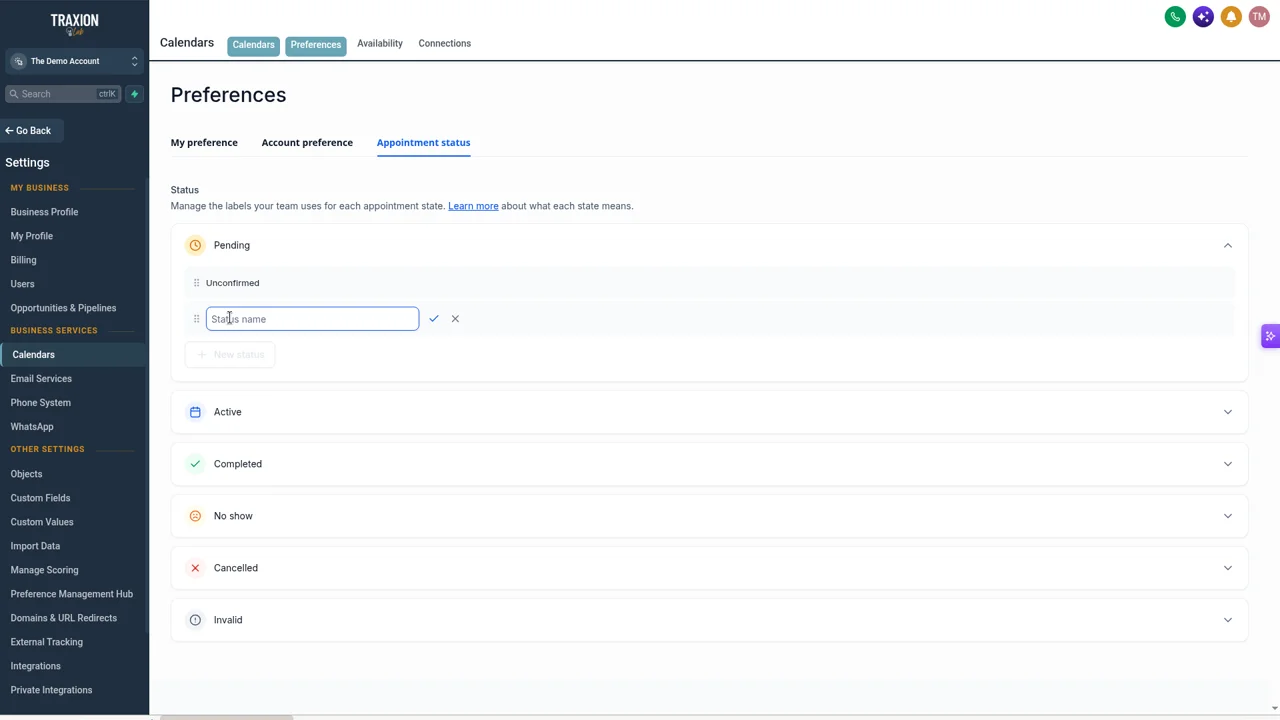
To rename a status, hover over it and click the pencil icon.
To retire one, hover over it, click the archive icon, review the impact, tick the checkbox, and click Archive. To bring it back, open its group, expand Archived, and click the restore icon.
Part 3 · Use them
Set a status from the New appointment window, the appointment details panel, or the Appointment list view. Pickers are grouped by state and searchable.
In a workflow, add the Appointment Status trigger and filter on your custom status to send a message when an appointment reaches that stage.
A real-world example
An HVAC company that wants fewer "where's my tech?" calls
They add Technician assigned and Tech on the way as Active statuses.
Assign
Dispatch sets Technician assigned. The slot stays held and no extra notification goes out.
Roll
The tech sets Tech on the way, and a workflow texts the homeowner.
Finish
Showed is still a Completed status, so a review request workflow built on it keeps working.
Tips from our team
- Put each status in the right state. If a status should hold the slot, it belongs in Pending or Active. If the slot should open up, use Completed, No show, Cancelled, or Invalid.
- Rename freely. Renamed statuses update in workflows automatically.
- Archive, don't delete. Archived statuses stay on past appointments and can be restored later.
FAQ
Your quick win this month
Add one status that matches your day
Add a Checked in or Tech on the way status and hook one text message to it. Or we can map your stages with you on a short onboarding call.
Works best alongside
Custom statuses work across your booking calendars and workflows.